Particulate Matter (PM) sensors—critical for monitoring airborne particle concentrations (e.g., PM₂.₅, PM₁₀) in indoor air quality (IAQ), industrial emissions, and environmental monitoring—rely on unobstructed optical or electrical components to deliver accurate data. Over time, dust, oil, and ambient debris accumulate on sensor surfaces, degrading performance (e.g., skewing light-scattering measurements, blocking airflow). While cleaning is feasible, it requires protocol adherence to avoid damaging sensitive components (e.g., laser diodes, photodetectors). This article details the technical viability of PM sensor cleaning, step-by-step best practices, limitations, and complementary maintenance strategies—aligned with manufacturer guidelines and industry standards (e.g., ISO 16000 for IAQ sensors).
1. Foundational Context:
PM Sensor Design & Why Cleaning Is Necessary
To understand safe cleaning practices, first contextualize how PM sensors operate—their design dictates which components are vulnerable to fouling and require care:
Common PM Sensor Technologies & Fouling Vulnerabilities
Most commercial PM sensors use one of two core technologies, each with distinct high-risk components for contamination:
| Sensor Technology | Operating Principle | Fouling-Prone Components | Impact of Contamination |
|-------------------------|--------------------------------------------------------------------------------------|------------------------------------------------------------------------------------------|------------------------------------------------------------------------------------------|
| Optical (Light-Scattering) | A laser or LED emits light into a sampling chamber; particles scatter light, which is detected by a photodetector. Concentration is calculated from scatter intensity. | - Laser/LED emitter lens <br> - Photodetector lens <br> - Sampling chamber walls <br> - Air inlet/outlet filters | - Scratched or dirty lenses reduce light intensity, leading to underestimation of PM concentrations (e.g., a 10% lens occlusion can lower readings by 15–20%). <br> - Clogged inlets restrict airflow, reducing sample volume and accuracy. |
| Electrical (Gravimetric/Impedance) | Particles accumulate on a weighted filter (gravimetric) or conductive surface (impedance); mass/conductivity changes indicate PM concentration. | - Filter media (gravimetric) <br> - Conductive sensing electrodes (impedance) <br> - Airflow fans/pumps | - Filter clogging halts measurements (gravimetric) or increases pressure drop (skewing airflow). <br> - Oil/dust on electrodes disrupts impedance readings, causing false high/low values. |
Key Takeaway
Fouling is not just a performance issue—it can render sensors non-functional. For example, in industrial emissions monitoring, a dirty PM sensor may fail to detect exceedances of regulatory limits (e.g., EPA 40 CFR Part 60), leading to non-compliance fines. Regular cleaning mitigates this risk—*but only if done correctly*.
2. Is Cleaning a PM Sensor Feasible? Technical Considerations
The short answer: Yes, but feasibility depends on sensor type (field-serviceable vs. sealed) and component accessibility.
Critical Distinction: Field-Serviceable vs. Sealed Sensors
Manufacturers design PM sensors with varying levels of user-accessibility, which dictates whether cleaning is practical:
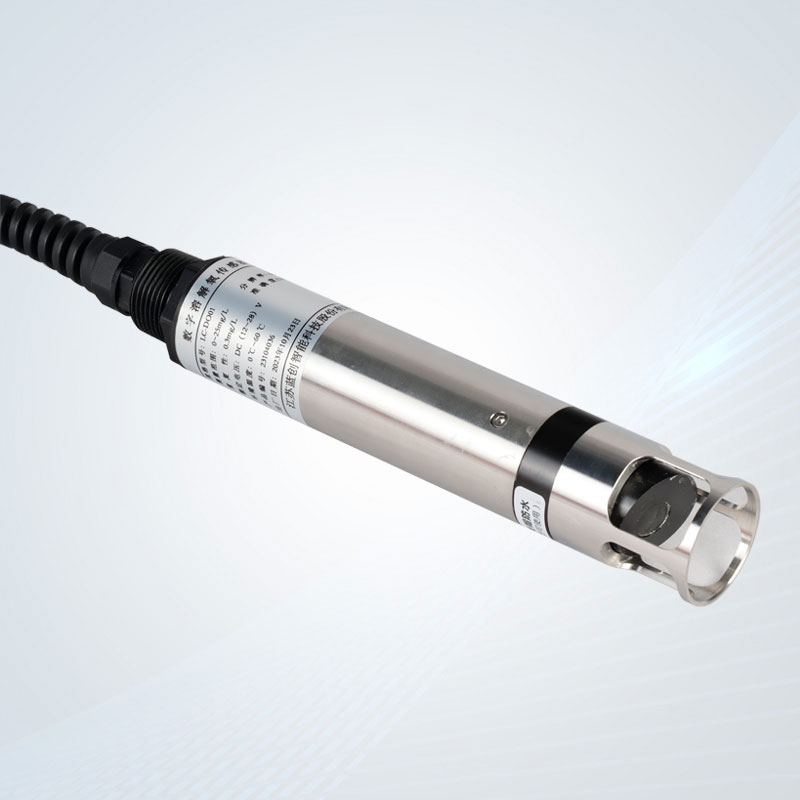
- Field-Serviceable Sensors: These have removable covers, accessible lenses, or replaceable filters (e.g., industrial-grade sensors like the TSI DustTrak™, or consumer IAQ sensors like the Awair Element). Cleaning is explicitly recommended by manufacturers for these models.
- Sealed (Non-Serviceable) Sensors: Miniaturized or low-cost sensors (e.g., some automotive PM sensors, compact IoT sensors) are hermetically sealed to prevent tampering. Opening these voids warranties and often damages internal components (e.g., delicate laser alignment). For sealed sensors, cleaning is not feasible—replacement is the only option if fouling occurs.
Manufacturer Guidelines: The First Rule of Cleaning
Always consult the sensor’s user manual before cleaning. Manufacturers provide model-specific instructions (e.g., allowed cleaning agents, disassembly limits) to avoid damage. For example:
- Some optical sensors prohibit alcohol on emitter lenses (it can dissolve anti-reflective coatings).
- Gravimetric sensors may require filter replacement (not cleaning) to maintain accuracy.
Ignoring these guidelines can lead to permanent sensor failure or invalidated calibration certifications.
3. Step-by-Step Technical Cleaning Protocol (For Field-Serviceable Sensors)
For accessible PM sensors, follow this industry-standard workflow to minimize risk and maximize effectiveness. The protocol varies slightly by sensor technology but shares core principles of gentleness and precision.
3.1 Pre-Cleaning Preparation
1. Safety First:
- Power off the sensor and disconnect it from all power sources (AC adapters, USB cables) to avoid electrical shock or short-circuiting components (e.g., fans, circuit boards).
- Wear nitrile gloves to prevent oil from your skin transferring to sensor surfaces (skin oil is a common cause of lens fouling and is difficult to remove).
2. Gather Tools:
Use only manufacturer-approved or industry-recommended tools to avoid scratches or chemical damage:
- Compressed Air: Ultra-low-pressure (20–30 PSI) canned air with a narrow nozzle (to target specific components); avoid high-pressure air (it can dislodge delicate parts like photodetectors).
- Cleaning Agents: Isopropyl alcohol (IPA) (70–99% purity—higher purity reduces residue), or manufacturer-specified lens cleaner (avoid water, ammonia, or abrasive solvents).
- Applicators: Lint-free microfiber cloths (for lenses), wooden or plastic toothpicks (for clearing clogged inlets—*never metal*, which scratches plastic), and foam swabs (for sampling chamber walls).
- Disassembly Tools: Small Phillips-head or Torx screwdrivers (if the sensor requires opening); use magnetized tools to avoid losing tiny screws.
3.2 Cleaning Optical PM Sensors (Light-Scattering Type)
Optical sensors are the most common and require the most care—their lenses and laser components are highly sensitive.
1. Disassemble (If Required):
- Remove the sensor’s outer cover using the appropriate screwdriver. Avoid forcing parts—if something sticks, refer to the manual (some covers use snap-fit designs, not screws).
- Locate the sampling chamber (where air and particles interact with light) and identify the emitter lens (near the laser/LED) and photodetector lens (opposite or at a 90° angle to the emitter).
2. Remove Loose Debris with Compressed Air:
- Hold the canned air can 6–8 inches away from the sensor (to reduce pressure) and blow gently across:
- The air inlet/outlet grilles (to clear clogged dust).
- The sampling chamber walls (to dislodge loose particles).
- The edges of the emitter/photodetector lenses (avoid blowing directly onto lens centers—this can push debris into coatings).
3. Clean Lenses (Delicate Step):
- For minor fouling: Lightly dampen a microfiber cloth with 99% IPA (less residue than 70%) and wipe the lens in gentle circular motions (start at the center, move outward). Never scrub—this scratches anti-reflective coatings.
- For stubborn residue (e.g., oil): Use a foam swab (not cotton—cotton leaves lint) dipped in IPA, and gently dab the lens (avoid rubbing). Allow the lens to air-dry completely (1–2 minutes) before reassembly—IPA evaporates quickly and leaves no residue.
4. Reassemble & Test:
- Replace the outer cover and secure screws to the manufacturer’s torque specifications (over-tightening can crack plastic housings).
- Power on the sensor and run a zero-calibration check (most sensors have a built-in function) to verify accuracy. Compare readings to a calibrated reference sensor (if available) to ensure no post-cleaning drift.
3.3 Cleaning Electrical PM Sensors (Gravimetric/Impedance Type)
Electrical sensors focus on filter or electrode maintenance rather than lens care:
1. Gravimetric Sensors:
- These use a disposable filter to collect particles. Do not clean the filter—it is designed for one-time use. Instead, replace the filter per the manufacturer’s schedule (e.g., every 7–30 days for high-PM environments).
- Clean the filter housing with compressed air to remove loose dust that could contaminate the new filter.
2. Impedance Sensors:
- Locate the conductive sensing electrodes (usually two metal plates inside the sampling chamber).
- Use a dry foam swab to gently brush away loose dust from the electrodes (avoid IPA—some electrodes have conductive coatings that alcohol can dissolve).
- For oil residue: Use a swab dampened with deionized water (not IPA) to dab the electrodes, then air-dry completely (water evaporates without damaging coatings).
4. Critical Limitations & Risks of Cleaning
While cleaning improves performance, it is not without risks—avoid these common mistakes to prevent sensor damage:
4.1Insurmountable cleaning restrictions
- Sealed Sensors: As noted earlier, opening sealed sensors (e.g., some automotive PM₂.₅ sensors) voids warranties and often misaligns internal components (e.g., laser-to-photodetector alignment), rendering the sensor inaccurate.
- Damaged Coatings: Anti-reflective coatings on optical lenses are fragile—even mild scrubbing or harsh solvents (e.g., acetone) can remove them, permanently reducing light transmission.
- Calibration Drift: Disassembling and reassembling sensors can shift components (e.g., the sampling chamber) out of alignment. Always perform a post-cleaning calibration (using manufacturer-approved standards) to correct drift.
4.2 High-Risk Practices to Avoid
| Risky Practice | Consequence |
|------------------------------|------------------------------------------------------------------------------|
| Using cotton swabs/linty cloths | Lint fibers stick to lenses/electrodes, causing new fouling and inaccurate readings. |
| High-pressure air (>50 PSI) | Dislodges delicate parts (e.g., fan blades, photodetector wiring) or bends sensor housings. |
| Water or aqueous cleaners (on optical sensors) | Water leaves mineral deposits on lenses and can short-circuit circuit boards. |
| Cleaning hot sensors | Thermal expansion/contraction during cleaning can crack plastic components or damage solder joints. |
5. Complementary Maintenance: Beyond Cleaning
Cleaning alone is not enough to ensure long-term PM sensor accuracy. Pair cleaning with these industry-best maintenance practices:
5.1 Regular Calibration
- Calibrate sensors per manufacturer guidelines (e.g., every 3–6 months for industrial sensors, annually for IAQ sensors) using NIST-traceable PM standards (e.g., Arizona test dust for PM₁₀). Calibration corrects for any drift caused by cleaning or component wear.
- For critical applications (e.g., industrial emissions monitoring), use a reference sensor (e.g., TSI 3016, a EPA-approved gravimetric sensor) to validate readings monthly.
5.2 Environmental Controls
- Reduce fouling at the source: Install the sensor away from high-PM or oil-rich environments (e.g., near vents, printers, or industrial ovens) if possible.
- Use pre-filters: Many sensors accept optional inlet pre-filters (e.g., HEPA pre-filters for IAQ sensors) that capture large particles before they reach the sensor—extending cleaning intervals by 2–3x.
5.3 Performance Monitoring
- Log sensor data over time to identify fouling trends (e.g., a gradual drop in PM readings for a known high-PM environment indicates fouling).
- Set up alerts (via sensor software) for low airflow or reading drift—these are early signs that cleaning is needed.
6. Self-Cleaning PM Sensors: A Low-Maintenance Alternative
For high-PM or hard-to-access environments (e.g., industrial chimneys, outdoor air quality stations), self-cleaning PM sensors are a technical solution that reduces manual cleaning needs. These sensors integrate automated cleaning mechanisms:
| Self-Cleaning Mechanism | How It Works | Advantage |
|--------------------------------|------------------------------------------------------------------------------|----------------------------------------------------------------------------|
| Ultrasonic Cleaning | High-frequency sound waves vibrate the sensor lens, dislodging dust and debris. | No physical contact—avoids lens damage; works continuously during operation. |
| Compressed Air Jets (Automated) | A built-in low-pressure air pump periodically blows air across lenses/electrodes. | Reduces manual cleaning intervals from monthly to quarterly. |
| Heated Sensors | The sampling chamber is heated to 50–60°C, preventing oil condensation (a common fouling source) on components. | Ideal for high-humidity or oil-rich environments (e.g., kitchens, industrial workshops). |
Self-cleaning sensors are more expensive upfront but lower lifecycle costs by reducing maintenance labor and sensor replacement frequency.